Saturday, April 18, 2015

Moulage and Sloper

It's been a while! I was in a crafting slump.

A moulage is like a body-double, a sausage casing made for your body. It's made out of woven fabric. It has just enough ease so you can try it on and not bust it! 

Years ago, I was in sewing school and had the opportunity to take a moulage class. So. Much. Fun! And so easy! Getting a sloper to fit had taken days and tears. The class itself took days, but the process was like a breath of fresh air. Instead of multiple fittings I made 1 version, a couple of small adjustments, tried it on to make sure, no adjustments. Yes! I was sold.

Unfortunately, or, rather, mostly fortunately, that moulage no longer fits. It hasn't for a while. I'd been meaning to make another, but it just didn't happen...Until now!


You can't tell, but I'm happy! Some issues with the bottom are because of sewing when tired. Lesson learned. They were fixed.


Here's what version #1 was like:


Adjustments were needed in the front and back.


Remember that lessoned I learned? I forgot it when I went to do the sloper:


Don't sew tired.


Once you've fixed the mistakes your tired self made, you can use the paper pattern of the moulage to check the fit of clothing, make a sloper (but not when sleepy) and use it to check the fit of other clothing patterns, make your own patterns and other things. Awesome!


Now, I don't like talking about stuff like this, but someone may find it helpful so I'm going to go ahead. As you may have noticed, I have a unique body. We all do! Mine gains about 10 pounds of water weight at a certain time of the month that then goes away until next time. Between that and other temporary changes, getting things to fit around that time is not fun. One thing that might look like a mistake but isn't is the extra room in the sloper. It's there for this issue. I want to see how clothing made to accommodate it will look month-long. Stay tuned for the results...once I do some other things that I really should do first. Until then, thank goodness for leggings, knit dresses, and lacy cardigans for warm weather wear!


Saturday, February 14, 2015

More Exploding Etuis

Christmas was a while ago, but it takes my friends and me a while to get back in gear and exchange gifts! A long while. Just 1 more to go now, though! Shh.


This one went to D:


This one will go to E:


Now to get us- and the etuis -together for a crafternoon. 


Friday, January 30, 2015

Crafting Aids and Macarons

Wow! January is almost over!
Slowly I've been chipping away at the list of projects I want to do this year. Participating in this craftalong has certainly helped keep me motivated. 

Another aid is being able to work and watch TV at the same time. I heard of people doing this a while back and thought man, they must be nuts. How does that work? But then I tried it. Double the entertainment! I'd try it with audio books, but, while I love books, I hate being read to. I prefer to be in control or something. I'm not sure. 

Anyway...

I made up this Magic 8 macaron...
...and already sold one! That makes me feel so nice.


Remember my first one? Want to see it made up? Here you go:


And a side pic at the bottom there:


I have more projects- macarons, exploding etuis -either done or nearly done. Pictures are another story. I'm looking forward to sharing them!

Monday, January 12, 2015

Hottokēki

I had a wonderful breakfast Sunday morning:


Okay, so, yes, I need to work on my food photography skills (make that all photography skills), but these, apparently, Japanese-style hot cakes were delicious!

I didn't beat the eggs as much as the recipe advised, which may account for them being a bit on the tough side, but that did not stop the stack of tall pancakes from being reduced to 0. They were even good reheated!

Wednesday, December 31, 2014

Year-End News

Happy (Almost) New Year!

I got a head start on my projects list by getting this done:


He's so forceful, the little one! 

You can make your own with this kit, now available in my shop!


As with my other kits, I designed the fabric and had it printed by Spoonflower.


Bonus 'cron:
Now that the recipient has received, I wanted to share this...


In real life this Captain America-inspired Christmas present is less washed-out. I had to surreptitiously take pictures in a dark corner as the sun was going down to avoid ruining the surprise!


 Have a fantastic 2015!


Monday, December 22, 2014

That Season Is Definitely Here

Whew! It's a whirlwind here. Christmas is a-coming!

I know it's been a bit of a popcorn-fest on this blog, but I made these "popcorn baubles" up and wanted to share.


This recipe is tweaked from one of my grandmother's old, old, old cookbooks:


1 cup sugar
1 cup water
1/3 cup corn syrup
1 teaspoon vanilla
1/4 teaspoon salt
32 cups of popped popcorn (takes a bit over 2 batches for me to get enough from my air popper. I get it popping while the syrup is cooking.)


Cook the first 3 ingredients in a small pot over medium to medium-high heat. I stir occasionally most of the time, but, really, I’m a ditz sometimes and I haven’t figured out a way to mess up this recipe up yet.

Put the popped popcorn into lightly greased, shallow containers (don’t include unpopped kernels if you can. They’re no fun.) I use 2 disposable aluminum roasting pans from the grocery store (but I wash them and keep them instead of disposing of them.)

When the syrup reaches softball stage- I use a candy thermometer to tell -quickly stir in the vanilla and salt then pour over the kernels. Stir to coat.

When it’s cool enough for you, grease your hands (butter is tasty!) and get to forming the sweet, corny goodness into balls.

Let cool all the way. If they haven’t been devoured after that, wrap in plastic to keep fresh and/or to hang them.


That's it! In about an hour, you have classic popcorn balls!


You can have bunches of fun dressing them up, like Christmas ornament baubles (above)
or Ice Planets:


I found this fantastic Firefly-inspired dessert idea here.


Sunday, December 7, 2014

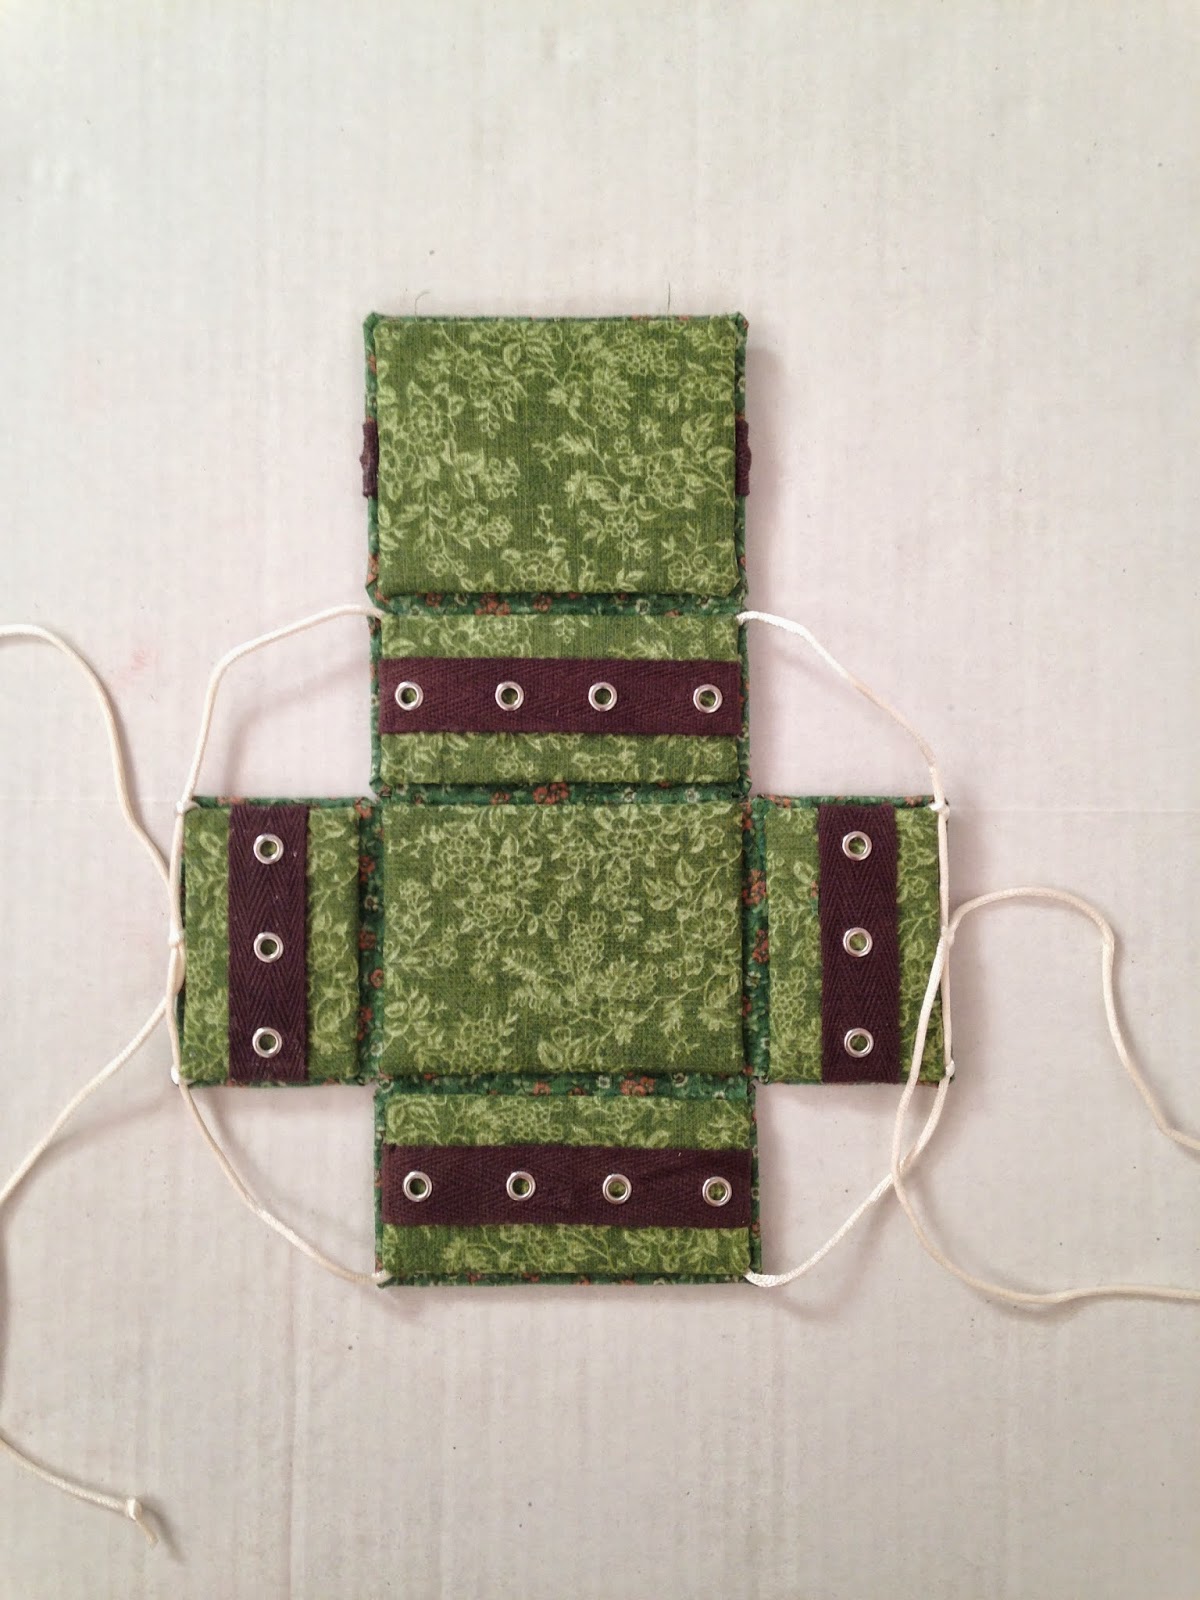
Exploding Etui Tutorial

I love fabric boxes! All kinds...I think, anyway. But what's so special about these ones? 


They explode!


I made this one for me. The inside grommet tape will hold straight pins and needles (sharp and blunt-tipped) and safety pins that I can use to keep things (little bits of ribbon, bias tape, baggies of supplies) in place while toting them around in this box. 

Etui simply means a small case. I use mine for storing sewing supplies, but they can be used to hold stamps, makeup, etc. Can you imagine one as a little dollhouse, a woodland scene or a city needing saving by some tiny action figures?


Want to make your own exploding box? Read on! No sewing is needed. Perfect gifts for those who don’t sew to make friends who do. Want to sew? Go for it! Glueing is much easier, though, and very sturdy!


You will need:
Chipboard, photo matting, cardboard or the like (maybe balsa wood?)
Fabric
Thin quilt batting (I used cotton)
Glue (white tacky glue is fine)
Cord (silky cord works nicely)

Optional:
Grommet tape, fabric, ribbon, ? for inside
Stuff to decorate outside (grommet tape, embroidery floss, beads, etc.)


Determine what shape, dimensions, features, whatever you want for your box. Cut the chipboard (or substitute) however you need. My new box is 4” x 6”. I cut four 4x6 pieces and two 4x4. Then I cut four 3.75x5.75” pieces and two 3.75x3.75 for the inside.


  Glue one side of all your pieces to the quilt batting. Cut batting to same size as board.


Cut your fabric so each piece is about a quarter to a half an inch bigger on each side of its board. Don’t glue the fabric onto the batting!


Lay chipboard batting side down on the wrong side of the fabric. Glue the corners of the fabric on the back (chipboard side) first then do the same with the edges.


Make sure everything dries securely.


Clothespins work well. So does sticking things under a book or laptop to dry.


To make a hinge cut a strip or cloth as long as the edges you’re joining and about 1.5”-2” wide. Glue in half so right sides are showing both ways. Make enough for all the pieces you are hinging together.


To keep things nice and tidy trim hinges like so:


Push outside pieces close together (making sure it’s the layout you want) and glue the hinges on the back. Weigh down and let dry. (Afterwards, I put on the outside grommet tape. It's completely optional.)


Take this opportunity to get interior decorating! 
For the pin and needle holders I cut grommet tape to a little longer than the length of the chipboard...


…centered it onto the piece then glued it down on the back.


 Glue down inside pieces. I started with ones that wouldn’t have silky cord string attached (the lid underside and the bottom.)


 Cut and attach cord. Mine are around 22-23 inches long. Glue to back of front piece then glue back piece on top and help it dry securely. 


Cut small pieces of cord for the loops. Glue them down so about a quarter of an inch sticks up past the edge. Thread long strings through and adjust loop size as needed. It should be a snug fit. Glue back piece on top.


Let dry. The waiting is the hardest part!